CDM
RuleFrame—The Business Rule Implementation Framework That Saves You Work
In this age of explosive growth of Internet based applications, the separation of application systems into logical 3-tier architectures has become widely recognized as a much more durable, manageable and affordable approach to system design than the traditional client-server architecture.
An application can be divided into the following three logical tiers:
· Presentation Layer, contains the services to support the application end user. This includes screen and input handling, such as menus, window navigation, graphical screen design, and mouse-activated actions
· Business Logic Layer, implements business functions and business rules
· Data Layer, stores the data and preserves data integrity
The Problem
Oracle Designer provides graphical tools for modeling the Presentation and Data Layers, but no equivalent tools for modeling the Business Logic Layer. Not surprisingly, analyzing, designing, coding and maintaining business logic is one of the most difficult and time consuming tasks in software development and maintenance. Business rule requirements are often 'hidden' in function or entity descriptions.
Furthermore, Designer does not promote a structured business rule implementation architecture. Therefore, every programmer uses his or her own method to implement business rules, sometimes in the Form logic, sometimes in check constraints, sometimes in database triggers.
To complicate things even more, it has become quite normal to add an HTML or Java front end to an existing Forms application. This can lead to a situation where the new front end does not enforce all business rules, or enforces them differently from the existing application. All too often data robustness is compromised.
Maintaining an application built like this is even more difficult than developing it. The developers that built the system have often left for another project, and the people that have to maintain the system have only limited knowledge. The Presentation Layer and the Data Layer are easier to maintain because one can actually see the screens, and the table structures are fully modeled in Designer. Business rules however, are almost invisible because they are not explicitly modeled.
This makes it quite difficult to make changes to the Business Logic Layer at the same pace as to the Data and Presentation Layer, creating a maintenance bottleneck. This bottleneck prohibits organizations from adapting to rapidly changing business requirements, which can have very serious consequences for their competitive position.
The Solution
CDM RuleFrame provides a powerful repository based framework for implementing an independent Business Logic Layer that supports applications developed using a whole range of development tools, including Developer, Oracle Designer Forms generator, Oracle Designer WebServer generation, WebDB and JDeveloper.
CDM RuleFrame includes methods and supporting utilities for:
· structured business rule modeling during requirements analysis
· transforming analysis information into preliminary design definitions
· structured business rule design and generation
· a business rule implementation architecture to provide consistent rule implementation
CDM RuleFrame Architecture
CDM RuleFrame business rule implementation architecture consists of four components:
The TAPI
The Table API or TAPI is a stored PL/SQL package generated by Oracle Designer. Designer generates one TAPI package per table. The TAPI provides data manipulation (DML) services for the table (insert, update, delete, lock) and implements a number of standard business rules such as assigning default values, performing uppercase conversion, and dynamic domain validation.
The CAPI
Unfortunately, Designer only generates into the TAPI the business rules that can be defined in the table and column meta data stored in the repository. There are many rules that you need to implement which cannot be defined declaratively. To record these rules, we use the CAPI. This package contains:
· code to interact with the Transaction Management mechanism
· standard services (functions) to get column values, get aggregate values like sum and count, and check for the existence of a row matching specified criteria
· the code for each business rule you define
The CAPI is called by the TAPI every time DML is performed. Therefore, the TAPI and CAPI work together to enforce all business rules.
Together the TAPI and CAPI contain all Business Rules for a Table
The CDM RuleFrame Utilities automatically generate the CAPI packages based on information you record during Business Rule analysis and design. The code for the interaction with the Transaction Management package and the standard services is 100% generated. The code for calling a business rule and handling errors returned by that rule is 100% generated. The only code you have to write is the code that actually performs the validation for each business rule.
The Access Layer
Though there are a variety of options, the architecture is typically set up in one of two ways:
· Forms perform DML directly on tables. Each table has a pre-update, pre-insert and pre-delete database trigger, which calls the TAPI validation code, which in turn calls the CAPI. Therefore, every time a row is inserted, updated or deleted, the data is validated first and only written to the table if the validation succeeds.
· Forms perform DML against views (VAPI). Each view has an ‘Instead of’ trigger, which calls the TAPI DML procedures to insert, update and delete rows. The TAPI DML procedures call the TAPI validation code that calls the CAPI. Again, the data is validated first and only written to the table if the validation succeeds.
The VAPI can be either one to one with a table, or a business VAPI that spans multiple tables. The VAPI provides data independence, which can be invaluable when integrating legacy and new systems. It also allows for a more flexible user interface by making it possible to have updateable complex views.
Transaction Management Mechanism
The heart of the CDM RuleFrame implementation architecture resides in the Transaction Management mechanism. CDM RuleFrame provides for transaction level enforcement of business rules. A transaction consists of all DML statements between two commits. Unlike check constraints and database triggers, CDM RuleFrame does not check business rules at the moment the user performs DML. Rather, CDM RuleFrame stacks the rules and checks them only at the moment of commit. This allows you to implement business rules such as mandatory master/detail rules, which you could not otherwise enforce on the server.
Figure 2. The CDM RuleFrame transaction management mechanism
The Transaction Management mechanism works as follows:
The user enters data via a form and at some point presses commit. The form then opens a transaction. (step 1) As each record is posted to the database, the TAPI fires and in turn calls the CAPI. (steps 2-3) The CAPI loops through all business rules for the table and determines which rules need to be enforced. (step 4) If a rule needs to be enforced, it is added to the rule stack. (step 5)
After all records have been posted, the Transaction Management package loops over all the rules that were placed on the rule stack and performs the validation. (steps 6-9) If a validation fails, an error is written to the error stack. (step 10)
After all rules have been checked, if no errors occurred, control returns to the form and the data is committed. (step 11) If any errors occurred, the Transaction Management package returns a ‘Transaction Failed’ exception to the form. The form then reads the error stack and displays a list error messages to the user. (step 12)
How do I build a Business Logic Layer?
At this point you are probably thinking to yourself, “This is all very interesting, but let’s cut to the chase here. How do I actually build this Business Logic Layer? How do I get my business rules into the CAPI packages?”
The rest of this paper discusses a step-by-step approach for performing the Analysis, Design and Generation of the Business Logic Layer using the architecture and utilities provided by CDM RuleFrame.
Figure 5 Business Logic Layer in the Development Process
Business Rule Analysis
Structured Business Rule Modeling lays the foundation for building the Business Logic Layer in any application. In Oracle Designer, Business Rule modeling complements Entity modeling and Function modeling. As with Entity modeling and Function modeling, it is as much an art as it is a science.
Business Rule information comes from the same sources as Entity and Function information. A number of business rules follow naturally from Data Modeling (datatype, allowable values, relationships and their optionality, cardinality and transferability, super and subtypes). Other rules are found in legacy system documentation, regulations, manuals, and job descriptions. Most rules will be distilled from interviews conducted with key users. Specific questions can be asked to determine the business rules: "what values can be assigned to this attribute?", "what value changes are allowed for this attribute?", "who is allowed to create, change or remove this object?", "is there a limit to the number of instances/sum/maximum/minimum of this value", “are there relationships between these date attributes?”, etc.
If you have ever done Requirements Analysis for an application system, these are not new concepts to you. What is new is that CDM RuleFrame provides you a structured manner in which to define and record business rules in the Oracle Designer repository.
Key Elements of a Business Rule Analysis Definition
The basic steps for recording your business rules analysis are as follows:
1. Create process events for entities
One of the basic steps in structured business rule analysis is to determine the events that trigger a business rule to fire. In other words, when does the business rule need to be checked? The possible triggering events are: Create, Update, and/or Delete of entity. For the Update event, you can usually narrow it down to the update of specific attributes and/or relationships.
Oracle Designer lets you define Events and record these events against Business Functions. The CDM RuleFrame utilities provide a utility to automatically generate all possible events for each entity, attribute and relationship defined in your Entity model. As a preliminary step, run the utility to create default events, which you will use later when defining the rules.
2. Record your business rules using the Business Rule Function object
Oracle Designer does not provide a structured object for recording business rules during the analysis phase of a project. A few types of business rules can be recorded in the structured elements associated with the data model. If it is possible to record a business rule in one of these structured elements, do so.
· attribute definition properties
· relationships
· unique identifiers
If no structured element exists for recording a particular rule, you should record the business rule using the Business Function object. This means that Designer will now contain two kinds of business functions:
· presentation/batch functions
· business rule functions
Create a separate hierarchy for each of these two types of function. Organize the business rule function hierarchy per entity.
Rule Label
In order for the Business Rule Transformer to work correctly, business rule function label must be formatted according to the following convention. The transformer will use this information in order to create Business Rule Design Definitions.
BR_[entity short name]###([decomposition id])_[type abbreviation]
where…
· the label always begins with ‘BR_’. This identifies a business function as a business rule.
· the entity is the ‘main’ entity triggering the rule
· decomposition id is A, B, C, etc.
· ### is a 3-digit sequence number making the rule unique within the entity
· the rule type abbreviations that apply are defined in the Business Rule Classification Scheme below.
for example, BR_ENT001_ATT
Rule Description
The Rule Description consists of one or two sentences summarizing the business rule. This information is stored in the business function short description property.
The Rule Description will be used by the Business Rule Design Transformer to create the default error text that is displayed to the user when the business rule is violated. Keep this in mind when you write the description.
Business Rule Classification Scheme
As you begin to uncover the business rules of any application, you will notice that rules tend to fall into predictable patterns. If we formalize this classification of business rules, this information can actually be used to help generate business rule code later during the Design and Implementation phase. Knowing these categories can also help you ask the right questions during business rule analysis.
The rule types marked with an asterisk in the charts below must be recorded using the Business Rule Function. The other rules can be recorded using properties in the entity, attribute and/or relationship objects.
The 3 letter Type Abbreviation is shown in parentheses.
Static Data Constraint Rules
|
Sub-class |
Rule |
Example |
|
|
|
|
|
Attribute Rules - rule involves only one attribute |
Simple Attribute |
Salary has a max length of 8. Department code must be numeric. |
|
|
Domain |
Employee job must be ‘CLERK’, ‘SALES REP’, or ‘MANAGER’ |
|
|
* Other Attribute (ATT) |
Employee salary must be multiple of 1000. |
|
Tuple Rules - rule involves one or more attributes in the same row |
* Tuple (TPL) |
Employee exit date must be later than employee hire date. An employee with job ‘SALESMAN’ must have a value for commission. |
|
Entity Rules - rule involves attributes of more than one row in the same entity |
Unique Identifier |
Each employee is uniquely identified by an employee number. Each employee also has a unique tax identifier. |
|
|
* Other Entity (ENT) |
No more than 20 departments are allowed. |
|
Inter-Entity Rules - rule involves attributes and/or relationships from different entities |
Relationship |
Each employee can work for one and only one department. (optional) Each employee must work for one and only one department. (mandatory) |
|
|
* Restricted Relations (RER) |
An employee can only be managed by an employee with job ‘MANAGER’. |
|
|
* Other Inter-entity (IER) |
The project assignment start and end dates for an employee should lie between the start and end dates defined for the project. |
Dynamic Data Constraints
|
Sub-class |
Rule |
Example |
|
|
|
|
|
Create - must be true when record is inserted |
* Create Rule (CRE) |
You may not create a project assignment for a project that is already finished. |
|
Update - must be true when record is updated |
* Attribute Transition (ATS) |
Allowed transitions for civil state of employee: unmarried -> married -> divorced -> married |
|
|
Transferable Relationship |
You may not transfer an order item from one order to another. |
|
|
* Other Update (UPD) |
You may not update the standard rate of an employee if the exit date is in the past. |
|
Modify - must be true when record is inserted, updated and/or deleted |
* Modify Rules (MOD) |
You may not create or update a Project Assignment if the related Project is already finished. |
|
Delete - must be true when record is deleted |
Relationship |
If a department that still has employees is deleted, give an error. If an order that still has order lines is deleted, delete the order lines as well. |
|
|
* Other Delete (DEL) |
You may not delete a file before it has expired. |
Change Event Rules with DML
|
Sub-class |
Rule |
Example |
|
|
|
|
|
|
Default Value Rules Simple * Complex (DFT) |
When creating a customer, the default value of the Total Project Limit is 10000. When creating a new employee, the default department is the department of the employee’s manager. |
|
|
* Other Change Event Rule (CEV) |
When an employee’s salary is changed, write a record to the audit history table. |
Change Event Rules without DML
|
Sub-class |
Rule |
Example |
|
|
|
|
|
|
* Change Event without DML (CEW) |
When the end date of a project assignment is changed, send an email to the employee’s manager. |
Authorization Rules
|
Sub-class |
Rule |
Examples |
|
|
|
|
|
|
Function Access |
Role based security, menu generation |
|
|
Vertical Data |
Role based security, table access |
|
|
Horizontal Data |
Always implemented as Dynamic Data Constraint Rules |
3. Associate Triggered By events with your business rules
The next step is to analyze when it is possible that a particular rule could be violated (constraint, authorization) or needs to be executed (change event). It turns out that the various rule classes have consistent patterns of triggering events. For example: An attribute rule will always need to be triggered when a row is created, or when the specified attribute is updated; A tuple rule will always need to be triggered when a row is created, or when any of the specified attributes are updated; and so on.
You created default events in step one. You can then link those events to your business rule functions in the RON.
4. Record Business Rule - Data Usage
Record the entity usages of all rules. For validation rules, this is always ‘retrieve’. For Change Event rules, the usage can also be ‘create’, ‘update’ and/or ‘delete’.
If the business rule needs to check the value of an attribute in order to determine if a rule is true, then this attribute must be registered as a usage for the business rule function. If the validation requires the value of a relationship (foreign key column), then the relationship must be registered by:
· including the ‘Form’ entity as usage for the business rule function
· setting the Retrieve? property of the entity usage to Yes
· entering the relationship in the Comment property of the entity usage. Use the following convention: <RL>[relationship name]->[other entity name]</RL>
5. Clean up unused events
After you have specified all your business rules, you can clean up unused events by running the ‘Cleanup unused events for entities’ utility.
Business Rule Design
Key Elements of a Business Rule Design Definitions
In order to fully define a business rule, the following information must be specified.
· Triggering Conditions: When is it possible for the rule to be violated?
· Data Usages: What columns (new or old value) from its own table does the CAPI require in order to code the rule?
· Error Message: What message must be displayed when this rule is violated. (This message must be defined in the Headstart message dictionary.)
· Rule Type: Is the rule a Change Event with DML, a Data Constraint, or Change Event without DML? Change Events with DML must be performed first, since these rules can trigger more rules. Data Constraints must be performed second. Change Events without DML should only be performed if there were no errors in the other rules. It is also useful to distinguish between Static and Dynamic Data Constraints. Since Static Data Constraints refer to the value of data, they can be checked as part of a ‘Validate All’ process performed on an existing table, while Dynamic Data Constraints cannot since they depend on the current action being performed.
· Rule Code: For validation rules, one or more statements that result in a Boolean TRUE if the rule is passed or FALSE if the rule is violated. For change event rules, the code that performs the change event.
Storing a Business Rule Design Definition in Oracle Designer
Oracle Designer does not provide a structured object for recording business rules during the design and build phase of a project. Some business rules can be recorded in the structured elements associated with the Logical data model.
· column definition properties: datatype, max length, optional, uppercase, default value, derivation, denormalization
· primary, unique and foreign key constraints
For all other business rules, record the Design Definition using the Database Trigger object and its associated PL/SQL definition. Set the ‘Complete’ property of the Database Trigger object to ‘No’ and use the Business Rule Design Definition naming convention to indicate this is not a real database trigger: BR_<TABLE ALIAS>###_<RULE CLASS>, for example BR_ENT001_ATT. The key elements of the Business Rule Design Definition can be mapped to these objects as follows.
|
Key Element |
Object |
Property |
|
Triggering Conditions · DML Actions · Update Triggering Columns · When Condition |
Database Trigger Database Trigger Column Usages Database Trigger |
Insert?, Update?, Delete? Column Trigger When Condition |
|
Data Usages |
PL/SQL Trigger Module |
Arguments |
|
Error Message |
PL/SQL Trigger Module |
Notes, tagged text, <MG> </MG> |
|
Rule Type |
PL/SQL Trigger Module |
Notes, tagged text, <TY> </TY> |
|
Rule Code |
PL/SQL Trigger Module |
PLSQL Block |
Storing a Business Rule Design Definition in Oracle Designer
The main steps performed during business rule design and implementation are as follows:
1. Run the Business Rule Design Transformer Utility
By far the best way to create Business Rule Design Definitions is to transform the Business Rule Analysis Definitions that you defined during the analysis phase of the project. This also provides another strong incentive for doing formal business rules modeling during analysis. You can now leverage all that work using the Business Rule Transformer.
To run the transformer, simply choose the root function of your Business Rule function hierarchy diagram and run the utility. The utility creates one Business Rule Design Definition for each elementary business rule function. It determines the triggering events based on the event analysis recorded against the business rule function. It determines the PL/SQL Trigger Module arguments from the entity/attribute usages recorded for the business function. It automatically generates an appropriate error message into the Headstart message dictionary using the business rule description as the text. It determines the rule type from the business rule function name, which includes the rule classification code.
After the Design Definitions are created, you can use the Design Editor to open the PL/SQL block for each business rule PL/SQL Trigger Module and fill in the code for that business rule.
2. Run other Business Rule Utilities
There is special class of business rules which can be 100% generated by the CDM RuleFrame Utilities. These are the so-called Standard Business Rules. Currently, there are two sets of Standard Business Rules that can be 100% generated. The first implements the rules associated with the single table implementation of Supertype/Subtype Entities. The second implements rules associated with Headstart extended journaling.
3. Create additional rules using Business Rule Design Definition Utility
You can also create individual Business Rule Design Definitions without transforming. The utility prompts you for all the key elements of the business rule, including the PL/SQL code, and then creates the complete Business Rule Design Definition.
4. Check the triggering events for each business rule
The event analysis you performed during the business rule analysis phase is transformed automatically into trigger information in the database trigger definition, using the Insert?, Update?, and Delete? properties in conjunction with the Trigger Column Usages.
You can also further restrict when a rule is fired by recording a Trigger When Condition.
Example: There may not be more than one clerk in a department
This rule is triggered on insert of EMPLOYEE and on update of JOB or DEPARTMENT. However, we can put a further restriction on the triggering of this rule. We only need to check the rule if the new value for JOB is ‘CLERK’. If we are adding a SALESMAN or ANALYST, it is not possible to violate this rule.
Trigger When Condition: :new.job = ‘CLERK’
Furthermore, if you have added several clerks in a single transaction, you really only need to check this rule once per department. The qms_transaction_mgt package provides the not_on_stack_yet service to allow you to specify that you only want to check a rule if that rule is not already being checked using the same input parameters. This service is used in the Trigger When Condition to further limit how often you check this rule.
Trigger When Condition: :new.job = 'CLERK'
and
qms_transaction_mgt.not_on_stack_yet
('BR_EMP004_ENT' -- business rule name
, to_char(:new.dep_id)
)
5. Code your rule in the related PL/SQL Definition
Generated Business Rule Validation Function
Using CDM RuleFrame, the actual coding of the business rules is often quite trivial. Only in the most complex rules does the coding become more difficult. This simplicity is made possible by the Standard CAPI Services. These services comprise a set of procedures and functions which are automatically generated into each CAPI to provide standard functionality for use in business rules. The following is a list of the standard services.
· get_date/char/num_value: a function to retrieve the value of a given column on a given row from a CAPI.
· exists_row: a function which takes query criteria as input parameters and returns true if at least one row exists which matches the requested criteria.
· display_label: a function which takes a primary key as an input parameter and returns a label suitable for displaying in error messages. Example: the display label for Employee could be a concatenation of ID and Name: ‘7345, King’
· aggregate_value: a function which performs a calculation (max, min, count, etc.) for a given set of rows satisfying the requested query criteria.
In addition to the Standard CAPI Services, you can also add your own custom services as needed.
In the following sections, we will look at several rules of varying complexity and show how they are coded. Each rule is implemented as a boolean function. The function must return TRUE if the rule passes and FALSE if the rule is violated. In each case, we use the local boolean variable l_rule_ok to hold the value we will return. The skeleton for this function, including the required input arguments, is generated as part of the Business Rule Design Definition. Our task as developers then is to correctly set the value of the l_rule_ok variable.
Attribute Rule: Employee Salary must be a multiple of 100
Triggering Events: insert EMPLOYEE, update SALARY
Data Usages: SALARY
Rule Type: Static Data Constraint
Code:
l_rule_ok := mod(p_salary,100) = 0;
Inter-Entity Rule (decomposed): The project assignment start date must be greater than or equal to the project's start date
This rule resides in the PROJECT_ASSIGNMENT CAPI, but needs information about the associated PROJECT record in order to determine the validity of the rule. This rule uses the Standard CAPI Service, get_date_value, to retrieve the value of START_DATE from PROJECT. This eliminates the need to declare a cursor, open it, fetch the value, and close the cursor.
Triggering Events: insert PROJECT_ASSIGNMENT, update START_DATE
Data Usages: PRJ_ID, START_DATE
Rule Type: Static Data Constraint
Code:
l_rule_ok := trunc(p_start_date) >=
trunc(hsd_prj_capi.get_date_value( p_column_name=>'start_date'
, p_id=>p_prj_id
);
);
Entity Rule: There may not be more than one clerk in a department
In this example, we use the aggregate_value function to count the number of clerks, returning true if none are found. Note the line in this example ‘, p_not_id => p_id’. The aggregate_value service provides a ‘not’ version of each of the primary key columns so that you can specifically exclude the current record from the query. In effect, this call results in a query that says ‘Count all the employees whose department id is the same as mine, whose job is ‘CLERK’ and who are not me.’
Triggering Events: insert EMPLOYEE, update DEP_ID, JOB
Trigger When Condition: :new.job = ‘CLERK’
and
qms_transaction_mgt.not_on_stack_yet
('BR_EMP004_ENT' -- business rule name
, to_char(:new.dep_id)
)
Data Usages: ID, DEP_ID, JOB
Rule Type: Static Data Constraint
Code:
l_rule_ok := hsd_emp_capi.aggregate_value
( p_aggregate_function => 'COUNT'
, p_aggregate_column => 'id'
, p_dep_id => p_dep_id
, p_job => 'CLERK'
, p_not_id => p_id
) = 0;
Update Rule: You may not update the date ordered
This rule is triggered on update of the DATE_ORDERED column in ORDERS. As you can see, there is no condition associated with the update of this column. It is simply never allowed. In coding our rule, we can take advantage of the fact that this rule will only ever be checked when DATE_ORDERED has been updated. Also note that this is an example of a dynamic data constraint. We are not concerned with the value of DATE_ORDERED, but with the action of performing an update to it. Therefore, this rule could never be checked against existing data using the ‘validate all’ service.
Triggering Events: update DATE_ORDERED
Data Usages: ID
Rule Type: Dynamic Data Constraint
Code:
l_rule_ok := false;
Transition Rule: Allowable state transitions for Civil State include: Single to Married, Married to Divorced, Married to Widowed, Divorced to Married, and Widowed to Married
This is an example of a dynamic data constraint since you must access both the old and the new value of the CIVIL_STATE in order to check this rule. In order to access the old value for a column, you must manually add an argument to the PL/SQL Trigger module that was created by the Business Rule Transformer. The argument must be named p_old_<column_name> and the Defined By Column property must be mapped to the correct column in the table. At runtime, CDM RuleFrame will pass the correct old value into this argument. The code then simply becomes a matter of comparing the old and new values.
Triggering Events: update CIVIL_STATE
Data Usages: CIVIL_STATE, p_old_CIVIL_STATE
Rule Type: Dynamic Data Constraint
Code:
l_rule_ok := ( p_civil_state = 'M' ) or -- any transition to ‘M’ is allowed
( p_old_civil_state = 'M' and p_civil_state = 'D' ) or
( p_old_civil_state = 'M' and p_civil_state = 'W' ) or
( p_old_civil_state is null ) or
( p_civil_state is null)
;
This brings up an interesting point regarding transaction level rule enforcement. Since all rules are enforced at the end of the transaction, you must consider what might happen if the CIVIL_STATE is updated twice in the same transaction.
1. open the transaction, CIVIL_STATE = ‘S’
2. update CIVIL_STATE to ‘M’
3. update CIVIL_STATE to ‘D’
4. close the transaction
When you close the transaction, the rule will fail. Keep in mind that rules are only checked at the end of the transaction. While you might know that you went through the proper transitions, unless they are committed, these changes are not visible to the rest of the system. To everyone else, it looks as if you sent straight from ‘S’ to ‘D’ which is not a legal transition.
Rule of Thumb: Only one state transition is allowed per transaction.
Relationship Rule: An order line must belong to one and only one order, and an order must have at least one order line
This is an example of a mandatory master/detail relationship. You cannot validate this rule until both records have been inserted. Without CDM RuleFrame, the first part of this rule can be implemented using a deferred foreign key constraint on the ORD_ID column in ORDER_LINE. However, without CDM RuleFrame, the second half of this rule cannot be implemented on the server. You would have to put the code in a database trigger and there is no way to defer a database trigger until commit time. Therefore, in the past, we have dealt with this rule by either coding it into the Presentation Layer or simply ignoring the rule entirely.
With CDM RuleFrame, however, all CAPI rules are enforced only at commit time. Therefore, this rule presents no problem.
Create a foreign key on ORD_ID in ORDER_LINE.
In the ORDER CAPI, add the following business rule to check for the existence of an order line.
Triggering Events: insert ORDER
Data Usages: ID
Rule Type: Static Data Constraint
Code:
l_rule_ok := hsd_orl_capi.exists_row(p_ord_id => p_id);
In the ORDER_LINE CAPI, we must also add a rule to ensure that we don’t delete the last line for an order unless we also delete the order itself. Again, since we are checking this at the end of the transaction, we only need to check the order line rule once per order instead of once for every order line. Therefore, we can use the not_on_stack_yet service in the Trigger When Condition of this rule to enhance performance. Note also that this rule is a Dynamic Data Constraint.
Triggering Events: delete ORDER _LINE
Trigger When Condition: qms_transaction_mgt.not_on_stack_yet
( 'BR_ORL002_DEL' -- business rule name
, to_char(:new.ord_id) -- order (master)
)
Data Usages: ORD_ID, LINE_NUMBER
Rule Type: Dynamic Data Constraint
Code:
if hsd_ord_capi.exists_row( p_id => p_ord_id) -- order not deleted
then
l_rule_ok := hsd_orl_capi.exists_row -- at least one other order line still exists
( p_ord_id => p_ord_id
, p_not_line_number => p_line_number
);
else
l_rule_ok := true;
end if;
Inter-Entity Rule: Multiple Assignments of the same employee to the same project may not have overlapping date ranges
This rule shows an example where you need information from another table, but the query criteria is too complex for a simple get_…_value function. You can use the Headstart Utility ‘Create Custom CAPI Service’ to create a service to retrieve this information while hiding the complexity from the business rule. In the PROJECT_ASSIGNMENTS capi, create a custom service as follows.
function cs_pas_overlapping
( p_id project_assignments.id%type
, p_prj_id project_assignments.prj_id%type
, p_emp_id project_assignments.emp_id%type
, p_start_date project_assignments.start_date%type
, p_end_date project_assignments.end_date%type
)
return boolean
is
-- Purpose This function determines if the project assignment row identified in the input
-- parameters overlaps with any existing rows.
--
-- Usage This row could either be a new row or an existing row whose date range is
-- being updated. Therefore, we also include the line ‘id <> p_id’ to make sure
-- we don’t compare an existing row to itself, which would of course overlap but
-- is not an error.
--
l_overlap varchar2 := ‘N’;
begin
select ‘Y’
into l_overlap
from dual
where exists (
select null
from hsd_project_assignments
where prj_id = p_prj_id
and emp_id = p_emp_id
and id <> p_id
and ( ( p_start_date <= start_date and p_end_date is null )
or ( p_start_date between start_date and nvl(end_date,p_start_date) )
or ( p_end_date is not null and
p_end_date between start_date and nvl(end_date,p_end_date) )
or ( p_start_date <= start_date and
p_end_date is not null and
end_date is not null and
p_end_date >= end_date )
));
return l_overlap = ‘Y’;
end cs_pas_overlapping;
Then, in the rule code itself, you simply call the custom service.
Triggering Events: insert PROJECT_ASSIGNMENTS, update START_DATE, END_DATE
Data Usages: ID, PRJ_ID, EMP_ID, START_DATE, END_DATE
Rule Type: Static Data Constraint
Code:
l_rule_ok := not hsd_pas_capi.cs_pas_overlapping
( p_id
, p_prj_id
, p_emp_id
, p_start_date
, p_end_date
);
Change Event with DML: If the project assignment end date is greater than the project end date, set the project end date equal to the new project assignment end date.
This is an example of a change event rule that performs DML.
First, the rule retrieves the value of the project end date using the get_date_value service. It then determines if the project assignment end date is greater than the project end date. (An end date of null is greater than any specified end date.) It uses the built-in ‘upd’ service from the Project TAPI to perform the DML. Finally, the rule returns TRUE.
Triggering Events: insert PROJECT_ASSIGNMENT, update PROJECT_ASSIGNMENT.END_DATE
Data Usages: PRJ_ID, END_DATE
Rule Type: Change Event with DML
Code:
l_rule_ok boolean := true;
l_prj_end_date date;
cg$rec cg$hsd_projects.cg$row_type;
cg$ind cg$hsd_projects.cg$ind_type;
begin
l_prj_end_date := hsd_prj_capi.get_date_value(p_column_name=>'END_DATE',p_id=>p_prj_id);
if l_prj_end_date is not null
and ( p_end_date is null
or trunc(l_prj_end_date) < trunc(p_end_date)
)
then
cg$rec.id := p_prj_id;
cg$rec.end_date := p_end_date;
cg$ind.end_date := true;
cg$hsd_projects.upd( cg$rec, cg$ind, TRUE);
end if;
return l_rule_ok;
exception
when others
then
qms$errors.unhandled_exception(package_name||'.br_pas006_cev (f)');
return false;
end br_pas006_cev;
6. Check arguments of PL/SQL Definition
When coding your rule, you may find that you missed some attribute usages during analysis or that you have identified some ‘old’ values you need to check. These attribute usages must be added as arguments to the business rule function. The argument name must be either p_<column name> or p_old_<column name>, where ‘<column name>’ is a column in the table to which the business rule belongs.
Remember, data from the row being validated is passed in as arguments. Data from other tables or other rows in the same table is retrieved using the standard CAPI ‘get’ services.
Business Rule Generation
Once you have created the Business Rule Design Definitions and added the appropriate rule code, you are ready to generate the Business Logic Layer to the database.
1. Create the Custom API Definition
Run the Headstart utility, ‘Create CAPI Definition’ to create the CAPI packages. This utility takes all the Business Rule Design Definitions along with the Custom Services, and generates a CAPI package definition for each table. This package definition is stored in the Oracle Designer Repository.
2. Generate Custom APIs using Server Generator
Use the Oracle Designer Server Generator to generate the CAPI packages to the database. Note: The CAPI will not compile at this point because it contains references to the TAPI, which you have not yet created. (…and the TAPI contains references to the CAPI, so you can’t just compile it first either.)
3. Generate Table API using the Table API Generator
Use the Oracle Designer TAPI generator utility to generate the Table API. If you are using the TAPI database triggers as your Common Access Layer, be sure to check the ‘Create Database Triggers’ checkbox. Even if you are using the View API as your Common Access Layer, it is still a good idea to create these triggers so that even if someone tries to access the tables directly (via SQLPlus for example), they are still directed through the Business Logic Layer.
4. Recompile Invalid PL/SQL Packages
Since the Table API calls the Custom API and vice versa, you will always end up with invalid packages. Use the recompile script (recompl.sql) provided with Headstart to recompile these packages. If you still have invalid packages (use invalid.sql to check), you have probably made an error in your business rule coding.
Opening and Closing the Transaction
Now that you have generated the Business Logic Layer, you have only one task left. You must add code to the Presentation Layer to implement the transaction level rule enforcement features of CDM RuleFrame. In order to support enforcement at the transaction level, each transaction must be explicitly opened and closed using the services in the qms_transaction_mgt package. This must be done by each front end (e.g. Forms, Java, HTML, PL/SQL batch).
Oracle Forms
Forms generated with the Headstart Template Package will automatically open the transaction in the Pre-Commit trigger. The Post-Forms-Commit trigger will automatically close the transaction and, if necessary, open a window to display errors and/or warnings. This error window is subclassed from the Headstart object library into each generated form.
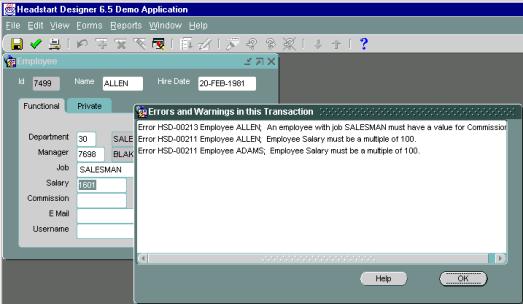
Oracle Form showing transaction errors
WebServer Generated Applications
The WebServer generator creates packages that call the Table API directly for each row affected by the DML. Unfortunately, it does not provide a hook for opening and closing a transaction involving multiple rows. Therefore, the opening and closing of the transaction is handled automatically by the CAPI, but each transaction can only consist of a single row. This means that true transaction level processing is not possible through this mechanism. So, for example, you cannot enforce a mandatory master-detail relationship using a WebServer Generated Presentation Layer. You can still use CDM RuleFrame with a WebServer Generated application, just not all of its features. These applications automatically use the Headstart version of the cg$errors package to display all errors from the transaction.
Other Front Ends
For other front ends such as PL/SQL batch programs or JAVA programs, you must ensure that at the beginning of a transaction, the following command is performed.
qms_transaction_mgt.open_transaction
( p_trans_opened_by => ‘<program name>’
);
Just before the commit statement, perform the following command.
qms_transaction_mgt.close_transaction
( p_trans_opened_by => ‘<program name>’
);
After the transaction is closed, the batch program must check for the Transaction Failed exception and display any errors.
PL/SQL Batch Programs
The CDM RuleFrame business rule implementation architecture is optimized for DML against individual rows and for small transactions. All rule checks are saved until the end of the transaction, and then each rule is checked once for each row. During interactive processing (e.g. forms), this is appropriate. However, during large batch transactions, this is an inefficient way to check business rules. There are several ways to improve the performance (listed in order of preference).
· Create smaller transactions: If your batch program allows it, this is the best way to enhance performance. It is faster to do 100 transactions of 10 records than 1 transaction of 1000 records.
· Disable rules that cannot be violated: If you are certain that a business rule can never be violated by the batch program, you can disable that rule during the batch run.
· Use set validations: For many business rules it is more efficient to write special code that checks all rows of a table at once, instead of one row at a time.
Example: A team must have only one team leader.
This rule can be validated for an entire table with one statement, instead of checking each individual team.
select tem_id
from team_members
where team_leader_ind = ‘Y’
group by tem_id
having count(*) > 1;
Example: Start date must be <= end date.
This rule can be validated for an entire table with one statement, instead of checking each row.
select id
from table
where start_date > nvl(end_date, start_date);
Client Experiences with CDM RuleFrame
CDM RuleFrame has been used by more than 20 clients since its introduction last year. Many of these projects have gone into production.
By and large, it has been a very positive experience. Clients are reporting that using CDM RuleFrame leads to better documentation, less programming effort, and fewer errors. Clients have been able to take advantage of the 3-layer approach by assigning their best PL/SQL programmers to the Business Layer while keeping their best forms programmers working on the Presentation Layer. Since this work can go on in parallel, productivity is greatly enhanced. Clients report that performance is good.
Based on client feedback, we have made improvements in the following areas.
· Fixed some bugs related to generating and using View APIs
· Specified how to base a module on a table in Designer but run the module against a VAPI in the deployment environment and created a utility to support this
· Improved documentation on how to handle performance issues for large pl/sql batch processes
· Improved documentation on how to perform DML from a Forms push button and make sure that any transaction errors are handled
· Improved performance in the aggregate_value and exists_row services
The final consensus is that CDM RuleFrame provides a stable and highly productive environment for creating the Business Logic Layer.
References
The topics discussed in this paper are covered in more depth in Oracle's CDM Standards and Guidelines, which are part of the CDM Advantage 2.0 toolkit. For more information on CDM Advantage, send an e-mail to: cdminfo@us.oracle.com
All utilities discussed in this paper are part of Headstart Oracle Designer, the ultimate productivity suite offered by Oracle Consulting for doing custom development with Oracle Designer and Developer.
CDM Advantage and Headstart Oracle Designer are contained in the iDevelopment Accelerators suite offered by Oracle Consulting. US customers can contact Mark Aiken (mark.aiken@oracle.com) for more information. People outside the US can e-mail Oracle's Internet Development Center of Excellence (idevcoe_nl@oracle.com.
About The Author
Lauri L. Boyd Oracle iDevelopment Center of Excellence
Senior Principal Consultant Rijnzathe 6
E-Mail: lauri.boyd@oracle.com 3454 PV de Meern
The Netherlands